
Fitting HS6 Carburetors to your GT6
Fitting Landrover Disco wheel studs to GT6
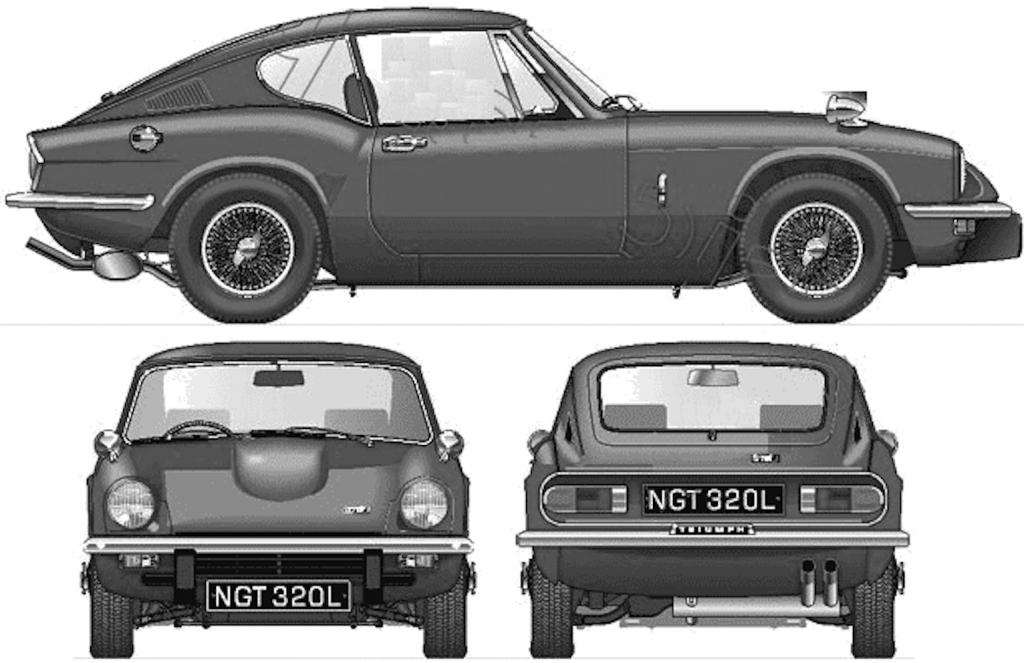
Triumph GT6
GT6 Triumph Sporting Six Club South Wales.

I am Mike James I own a Triumph GT6 mk3, I am known in the club as Mikey J. I served a 4 year electrical apprenticeship and have worked in a brewery (AB Inbev) for 35 years, the products we do are Stella Artois, Becks,Stella 4, Boddingtons and Super Tennants to name but a few so anyone drinking any of these products south of Birmingham it will of come from our brewery.
My first car I had was a Triumph Herald 12/50 reg number JTG 934D when I was 16 years of age passing my test at 17 I kept this car for 3 years changing it for a Ford Escort mk1. My 3rd car in 1977 was my first Triumph GT6 mk3 reg number TYD 780M mimosa yellow with brown interior, I kept this car for 3 years and due to a job change I sold it and not long after that the kids came along so sensible family saloons followed

In 1993 my wife suggested that if I wanted to I could buy myself another GT6 (yippee!!!), I tracked down the last owner of my GT6 who informed me that it was involved in a crash with a transit van and subsequently had been broken up. With this knowledge I started to look further afield, I looked at one actually in a barn in Bridgewater we couldn’t start it and it was a rotaflex but I wanted a swingspring. I went to look at three more GT6’s in Swindon but they weren’t suitable, I then enquired about another one in Cheltenham but this didn’t seem again to be what I was looking for so I didn’t bother following it up.
It was now the end of February 1993 and because it was my Wife’s birthday on 1st March (St Davids Day)I was going to the shops to get her a present, I passed by a house about a mile from my house and there it was a late 1973 GT6 mk3 in mimosa yellow. I couldn’t believe it, I envisiged that I would be trailering a GT6 from miles away and here was one exactly what I was looking for less than a mile from my house and with an MOT. I struck a deal and drove it home, when I got it home it had a good wash and polish. It was rough around the edges but it was going to be a project, it had six inch wheels on the front and nine inch wheels on the back with wheel arches beaten out to accommodate them also the suspension had been lowered.

I taxed it from May 1993 for six months taking it off the road 1st November for a five year body off restoration with a house move in between.
At this time I was working shifts so I was able to spend a lot of my spare time and rest days working on my car as it wasn’t interfearing with my family requirements and needs but it was still a slow process.
Many bodges were found as I worked through the rebuild as the car at that stage was twenty years old and like most of this age had been through the banger stage.
The overdrive had been wired in kettle flex with no inhibit switches to prevent it being selected in 1st,2nd or reverse.There was filler in the roof edge and everywhere else hiding all sorts of rot.
I also changed the suspension back to standard.
The six and nine inch wheels were changed for standard 5.5 wheels (these were changed again a few years later to minilites)The wrong brake servo had been fitted it had also wrongly been connected to the front and back brakes so I got the correct one from Steve Gill South Wales Triumph Sports Cars. The correct seals that I bought from Norton Servo then were used to refurbish it.
When the Dolomite gearbox with J type overdrive had been fitted by previous owner they hadn’t fitted the angle drive for the speedo cable drive which explained why the speedo wasn’t working.
The car also came with Triumph 2000 saloon HS6 SU carbs which could of dented the bonnet if engine back fired as there is not much clearance under the bonnet of a GT6 so these were changed back to Stromberg 150CDSE as standard.
A small boy racer steering wheel had also been fitted, I changed it back to an original one.
When I bought the car it had a glass sunroof, I removed this and fitted a fabric type as per Webasto/Britax (this is a neccesity in a GT6 because they all get very warm inside)
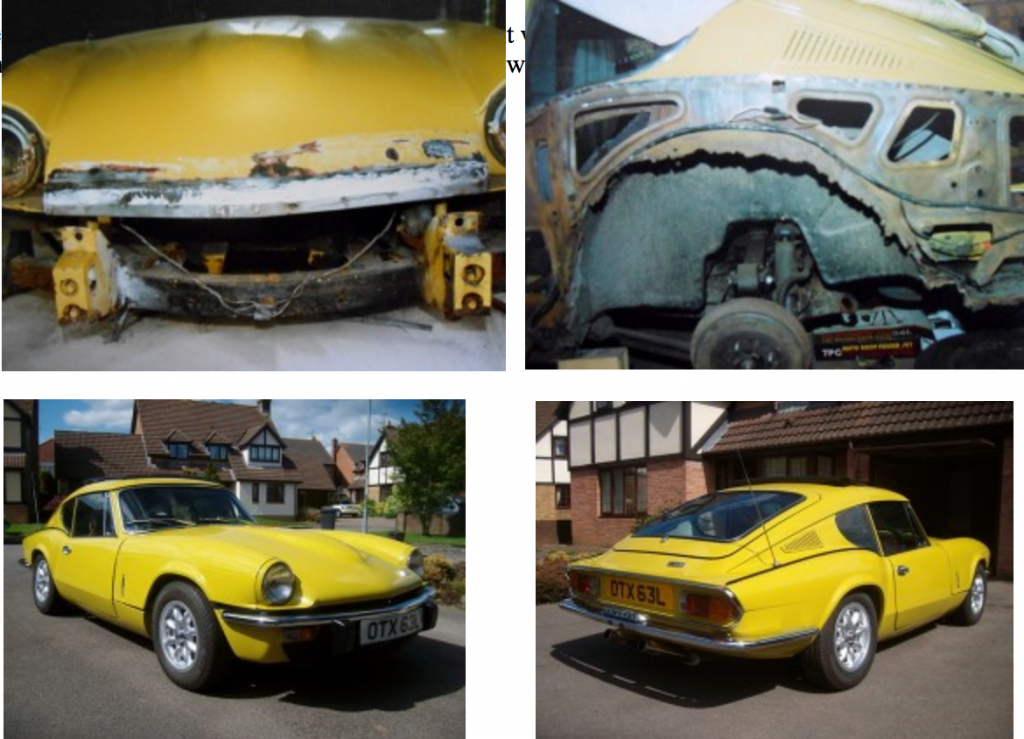
Bodywork

The original chassis was found to be to far gone the bonnet boxes,front cross member,front out riggers were rotten and several patches had been welded around the axle area so a good replacement was obtained which I had grit blasted/painted and then wax oiled.
I replaced both floors,both sills inner/outer and reinforcement panel,rear inner wings,both rear outer wings(having to cut out and weld in petrol filler apperture),boot floor,rear valance,roof repair panel and door skins plus severalother repair panels. I taught myself how to mig weld and by the time I finished I think I could of welded anything. Any rust you see on the surface is usually ten times worse underneath
The bonnet had already had replacement wings fitted but there were several areas that needed attention with new metal welding in to the nose cone and main bonnet sides.
I used a hot air stripper and removed all the paint from the car to enable a bare metal respray, I sprayed the etching primer to the car and a local garage sprayed it in two pack mimosa paint code 64.
Mechanicals
Karl Heinling re-built my diff which was an ex 1500 spitfire diff 3.63.
The gearbox was ex 1850 Dolomite with J type overdrive fitted. (my car was a non overdrive GT6 off the production line). With this combination the speedo is spot on as checked with my satt nav.
The engine was rebuilt by a friend of mine being the original engine with dome pistons late spec.
I refurbished all the running gear ie :- driveshafts, suspension using new bearings,bushes nuts and bolts etc.
I fitted copra nickel brake pipes(automec) and fuel pipe.
Goodrich braided flexible brake hoses.
Clutch master cylinder ,slave cylinder,brake master cylinder,brake calipers,back brake slave cylinders were all refurbished with systems then being filled with silicon brake fluid.
Putting The Car Back Together Again
With the chassis complete with all the new refurbished running gear,reconditioned engine,gearbox,new clutch,diff etc fitted to make it a rolling chassis the body was then refitted and the milestone of putting things back on the car and not having to take it back off had been achieved.first the windscreen wiper mechanism,heater,dashboard,wiring loom,carpets the car started to take shape starting to look again like a late Triumph GT6 mk3.
In 1998 it passed it’s MOT first time and on May 1st I taxed my car it wasn’t tax exempt as it wasn’t built before January 1973 as it was made in March 1973 but it would of and should have been tax exempt the following year but thanks to Blair and Brown governments I would have to wait until 2014 when the historic road tax was reintroduced.
1998 to present day. Since it has been back on the road I have continually improved it. Phoenix Extractor manifold with sports system.
Minilite wheels.
Refurbised seat foams and have black leather with yellow piping.
Unleaded cylinder head conversion.
Early GT6mk3/Vitesse cam Shaft
Kenlow electric fan(with over ride switch and indicator).
Alloy Rocker box cover.
Replacement door Sundym Glass.
Sin off oil filter conversion.
Oil Cooler.
Motolita steering wheel.
Alloy Steering Rack Mounts.
Cigarete lighter Socket(for my satt nav,I do not smoke).
Aldon Electronic Ignition.
6 way Fuse Box.
Air Horns.
You never really finish a car as there is always something to improve it.
In 2005 While attending The Tredegar Park Show the person who actually bought my car brand new in April 1973 when it was first registered turned up and introduced himself and a week later as promised he sent me some pictures of my car while he had it. Since then I have met two other previous owners as it has always remained a local car and never left the South Wales area.
Every year through the summer season I take my car to many of the shows with the other South Wales Triumph Sporting Six clubs guys they are a great bunch and when the show season has ended I always look forward to the Easter weekend when it all starts up again.
Mikey J
Extra fuse box by Mike James

Fitting an extra fuse box in my GT6
When they were building our cars they chose to only fit a 4 way fuse board, because times have changed with the fitting air horns, cooling fan, sat nav socket (ex cigarette lighter), extra gauges, i felt it was necessary to fit in an extra fuse board too.
I bought an eight way fuse board from a car show then i started to plan how i was going to fir it and where. I wanted to fit is somewhere where it did not look out of place so i decided to mount it behind the dashboard in the center section where the heater control, temperature and petrol gauges are
I also too the opportunity to fit three extra relays at the same time, one for my kenlowe fan, a second for my air horns and the third for any future requirements.
Making brackets and fixings
After taking measurements i cut a nylon strip and mounted the three relays, i then fabricated some fixing brackets out of stainless steel, bending them 90 degrees and twisting them to pick up existing holes.
Wiring
I picked up a 12 volt supply from the starter solenoid mounted on the bulkhead on the live side and fitted an in line to supply the fuse box to feed the first six fuses which would be permanently live. I then looped the live supply to each fuse with crimp connectors .
FUSE 7 :- I supplied via a switched ignition circuit which would power up my volt meter
FUSE 8 :- I supplied from the existing supply for the petrol and temp guage lights to power up the additional gauges i have fitted ( oil pressure, time clock and voltmeter lights)
I have wired the fuses as follows :-

FUSE 1 :- IS FOR ELECTRIC COOLING FAN
FUSE 2 :- IS FOR TWIN AIR HORNS
FUSE 3 :- IS FOR SPARE
FUSE 4 :- IS FOR CIGAREETE LIGHTER (used for sat nav)
FUSE 5 :- IS FOR TIME CLOCK

FUSE 6 :- IS FOR SPARE
FUSE 7 :- IS FOR VOLT METER
FUSE 8 :- IS FOR GUAGE LIGHTS.

MIKEY J
Fitting Electric Windows to My GT6
I found both my GT6 doors window glass were badly scratched and had several tight spots when opening and closing them so in January 2015 I purchased a replacement set of Sundym door glass from the TSSC shop. I also bought a universal electric window kit from another supplier.
I fitted the new window glass and replaced each of the rear window runner in each of the doors. I
then fitted new rubber/felts to both runners in each door and this made the windows easier and smoother to operate. Picture 1 shows my first attempt to fit the electric window kit which didn’t work properly.
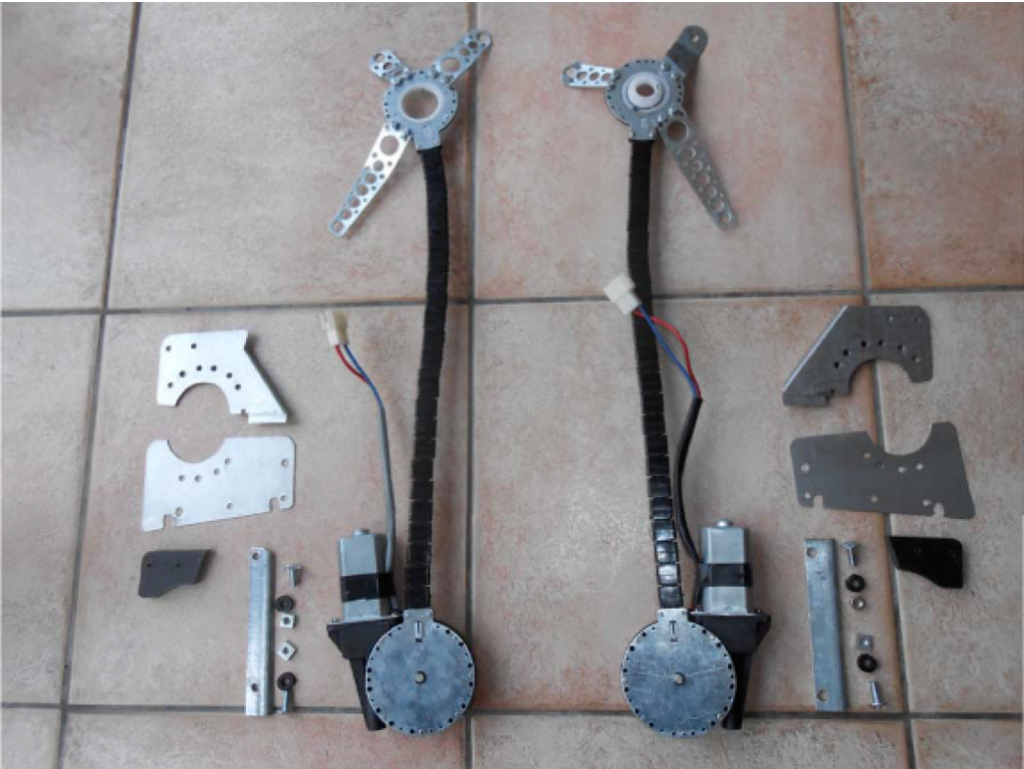
I fitted the electric windows drive units to each of the doors where a previous owner had fitted door speakers and with a temporary 12 volt supply powered the windows up and down but found that the windows struggled to open and close due to the tight bend radius of the drive cable when raising or lowering the glass the electric motor would stall. The motor drive unit is 55cms long and only comes at that length if a shorter drive unit was available it would probably of worked, I did strip
one of the drive units down to see if it was possible to shorten them but the drive belt is a predetermined length that can’t be shortened. I then decided not to proceed due to lack of time and stored the universal electric window kit away for another day.
I went to the restoration show October 2018 and got talking to a Dolomite Sprint owner who had converted his Sprint to electric windows by using Ford Transit Mk7 units. I looked into getting a pair of motors of Ebay but I then had a change of mind as I didn’t want to start cutting and messing around with my GT6 window regulators as modifications that I carry out on my car I do it with a view that they can be put back to standard and replacement regulators for GT6s are not in plentiful supply, so I then decided to fit my universal electric window kit and started in December 2018.
I couldn’t find any information on forums or the internet of anyone fitting electric windows to a GT6. I carried out a lot of measuring as there is not a great deal of space in a GT6 door to accommodate the electric motor and mechanism. I replaced the mounting screws on each of the
drive units with 4mm pan head screws after tapping the housing out rather than use the screws that were supplied with the kit.
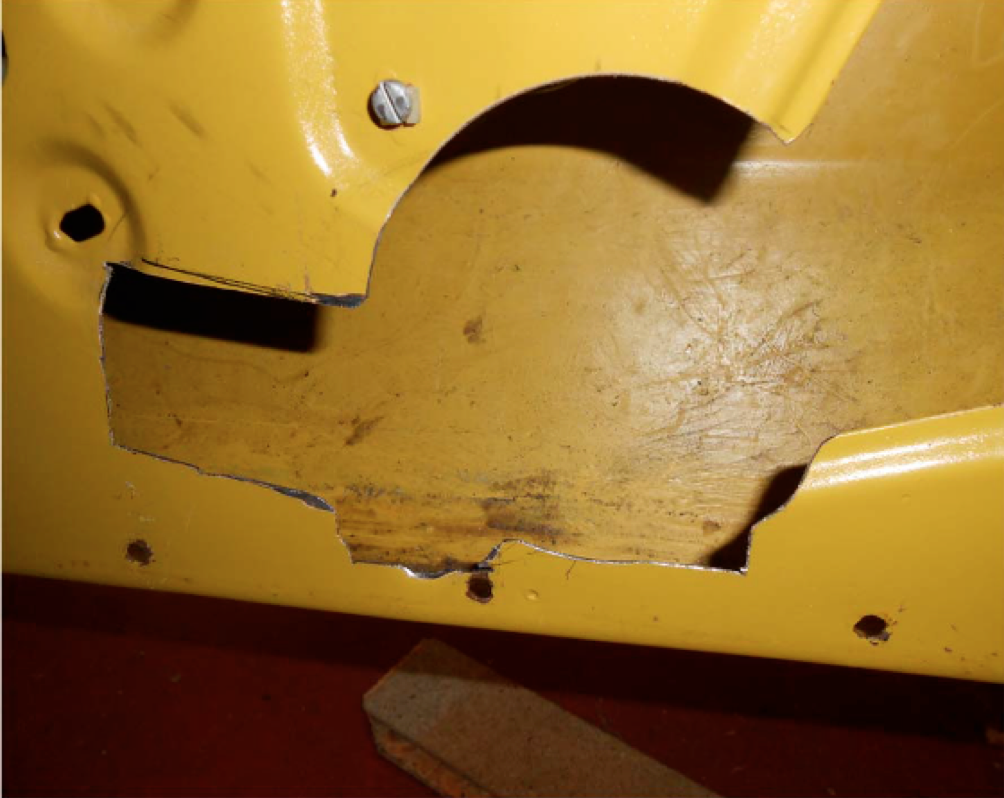
I then decided to keep the drive units as straight as possible with no radius bend on the doors to help with the raising and lowering of the windows not adding extra load to the motors. I started on the drivers door first and I measured and checked several times where the motor needed to be fitted into the door and drilled a 100mm hole with a hole saw and then offered the motor to the cut out marked around it. I then cut the required metal out with an hacksaw blade see Picture 2.
( When I was doing any drilling or cutting to the door I put old rags in the bottom of the inside of the door to catch as much of the metal fillings as possible and always put some wood to protect the door from being dented with the risk of a drill snatching. )
I applied primer and touch up paint to all bare metal surface exposed during cutting and drilling and
after vacuumed the inside of the door and taking the opportunity to add another layer of wax oil while the door cards were off.
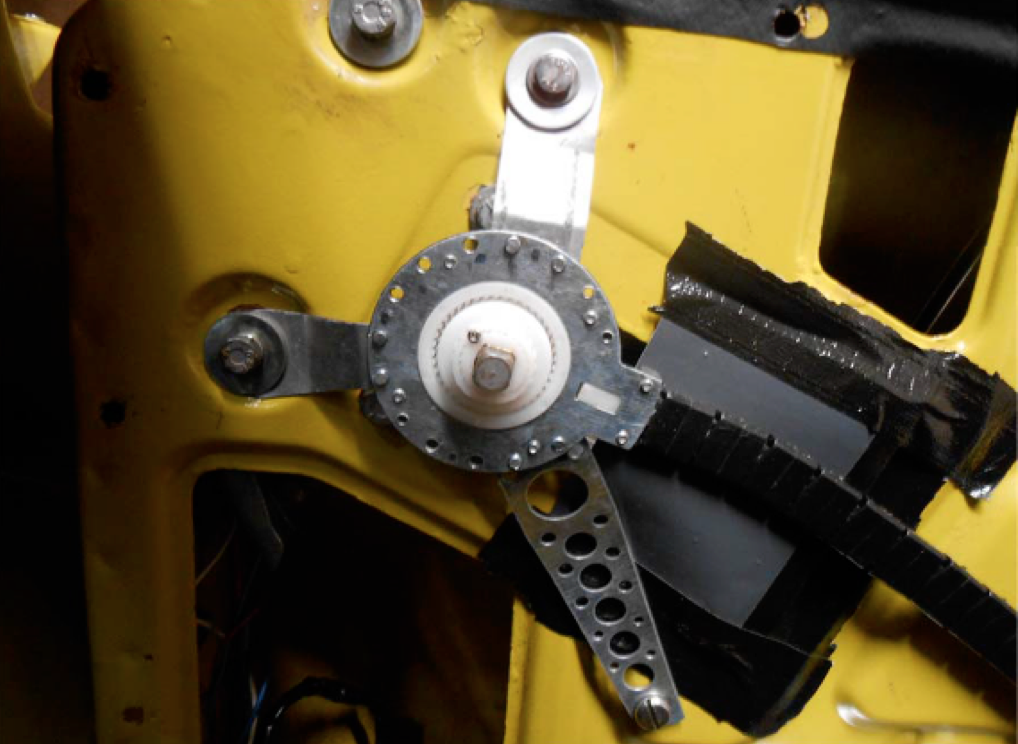
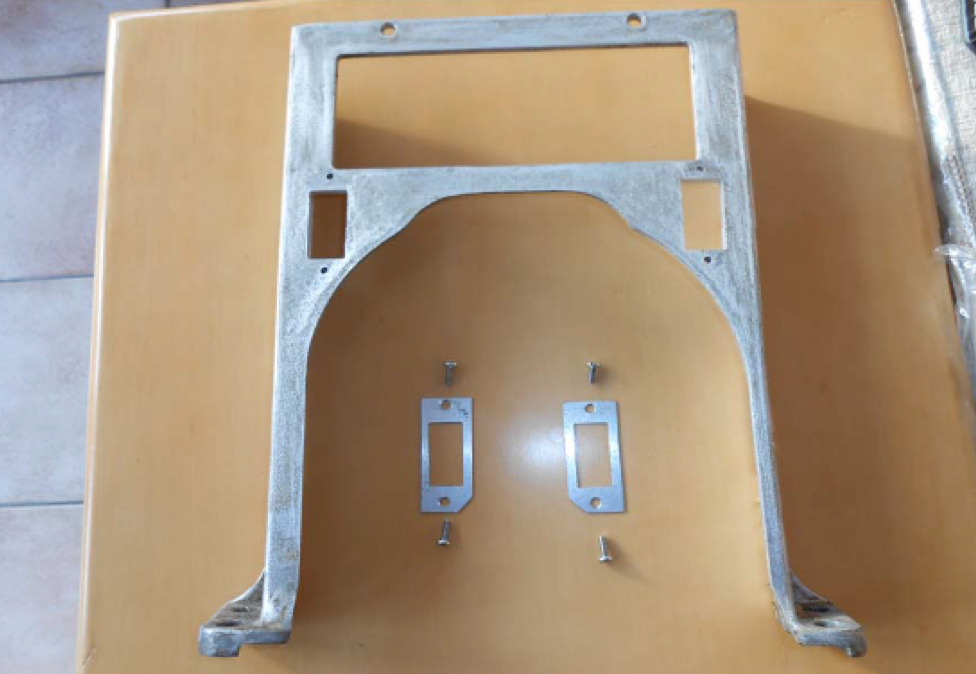
The kit supplies several adaptors for fitting onto the regulator shaft so I chose the the best one and I decided to use some brass shim foil which I formed into a shape and carefully tapped it onto regulator shaft with the adaptor to make a tight fit. I then used some of the brackets that were supplied along with some that I made up myself Picture 3 shows all the brackets I used for both sides.
I made up a spacer out of nylon to offset the top of the motor to allow window mechanism to pass
motor without fouling it see Picture 4.
On Final fixing I modified and changed brackets as I went along to suit the mounting of the regulator driven unit into position using two original existing fixing points and drilling a third which was a 6mm screw into a rivet nut. Picture 5.

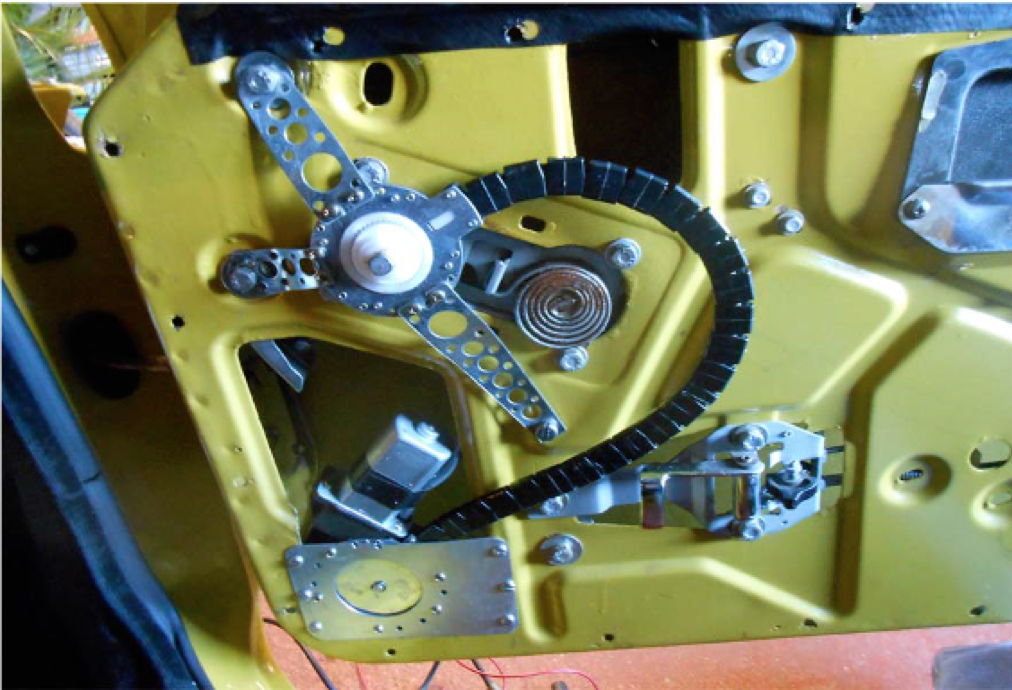
I then applied 12 volts to the drive unit and powered the window up and down slowly making sure that the GT6 window mechanism when lowered was clearing the drive unit motor. I found that the window cleared the motor so I then carried out the same intallation to the passenger door.
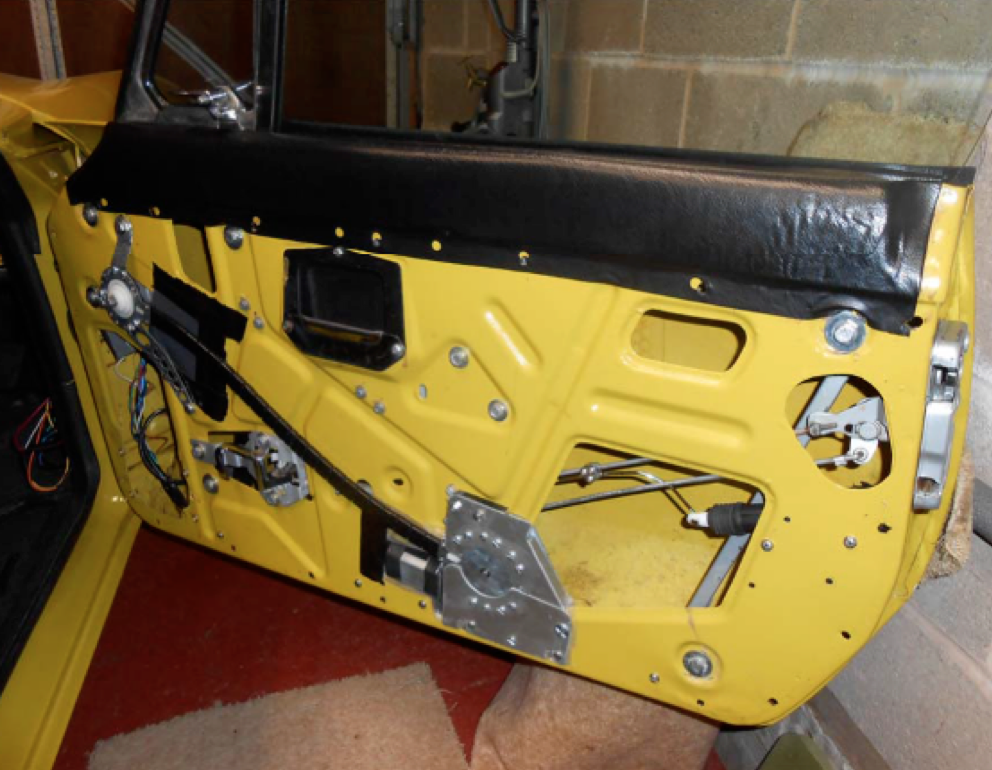
I again powered up the passenger door and found that there was plenty of clearance and both windows powered up and down without any problems . Picture 6 shows regulator and motor unit in position I also fitted some plastic membrane to the back of the motor which is inside the door to prevent ingress of moisture with rain or car washing pulling it through the door and trimming it off when all bolts and fixings were back in position.
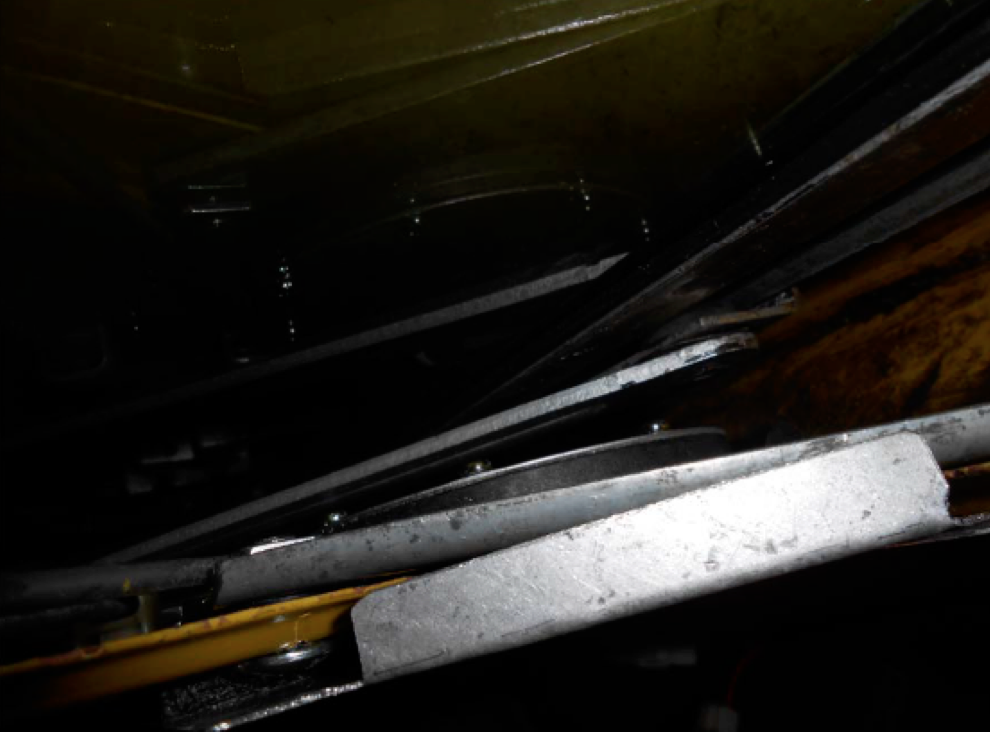
Picture 7 shows the clearance of the window carrier to the motor which is about 10mm.
I also fitted cable clips inside doors to make sure that the wiring was fixed in position and would not get caught up with the internal window mechanisms.
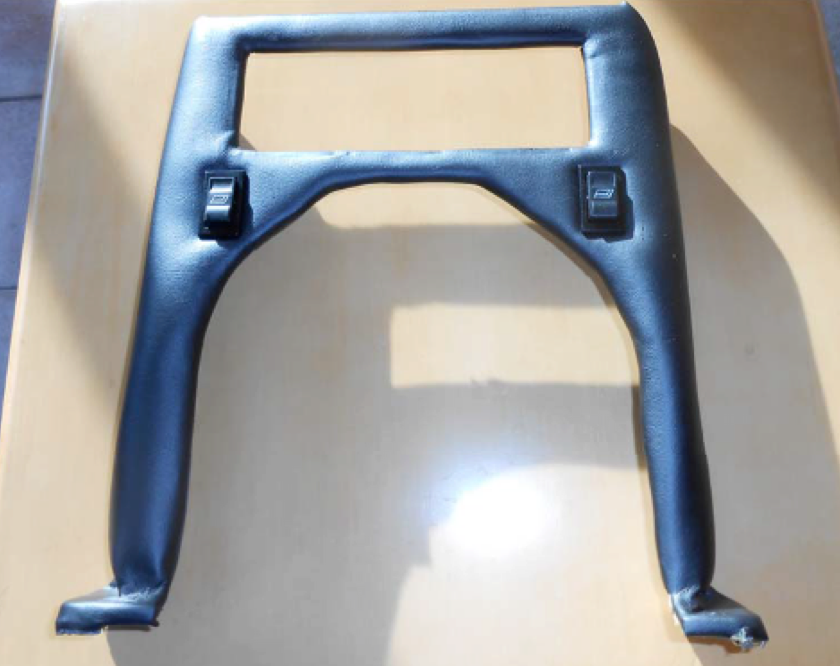
I had a spare centre consul which is where I decided to mount the switches for powering the electric windows. I stripped the old Vinyl trim off the consul and cut out the holes and made some plates for the switches. I then recovered the consul and fitted the switches in position. see pictures 8 and 9.
The wiring loom that came with the kit needed to be modified as it was supplied with two switches to be fitted to the drivers door and one to the passenger door, I only wanted a switch per door to power each door up which were to be operated within easy reach of driver or passenger mounted in the centre consul. I stripped the loom and switches and wired them up accordingly to suit as in Picture 10.
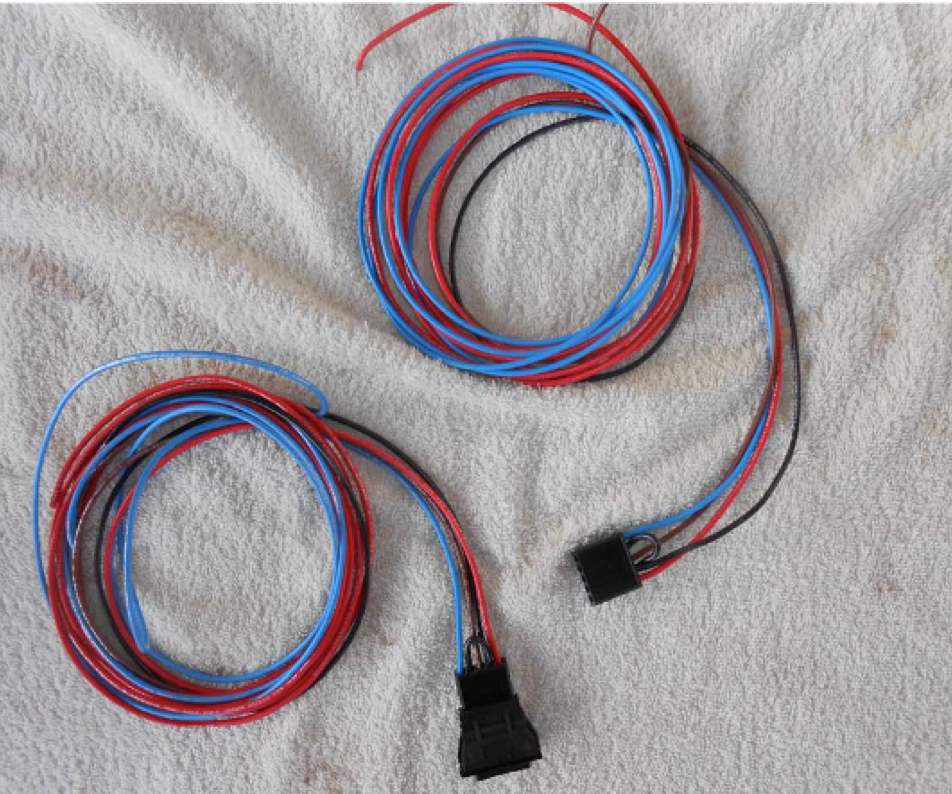
I removed the wiring lugs from the switch sockets using a small precision screwdriver and replaced it with the red and blue wires (re-using the lugs by soldering new wires on them) which go to the door drive unit motors. If the motors drives the windows the wrong direction swap the red and blue wires on the door connections as its easier there. The other two switch connections are a brown 12 volt supply wire from a fused source and a black 0 volt wire which is then linked to other switch terminal.
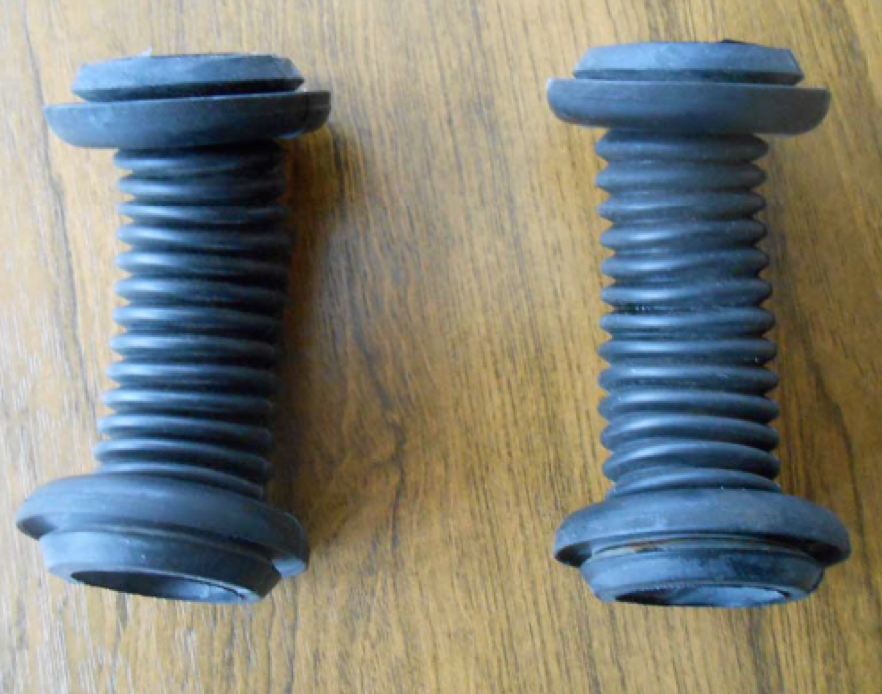
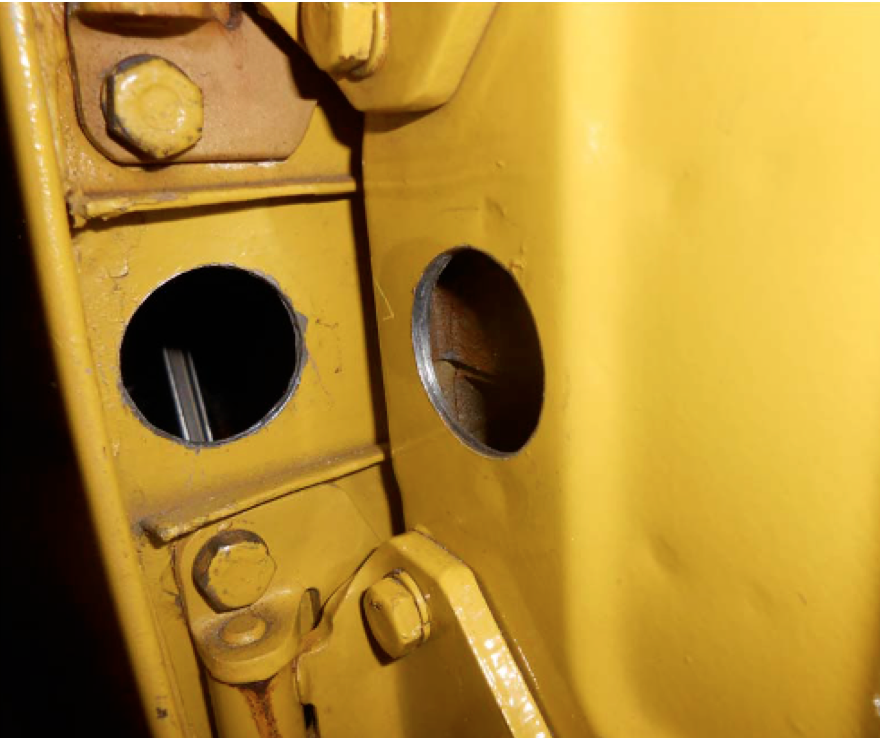
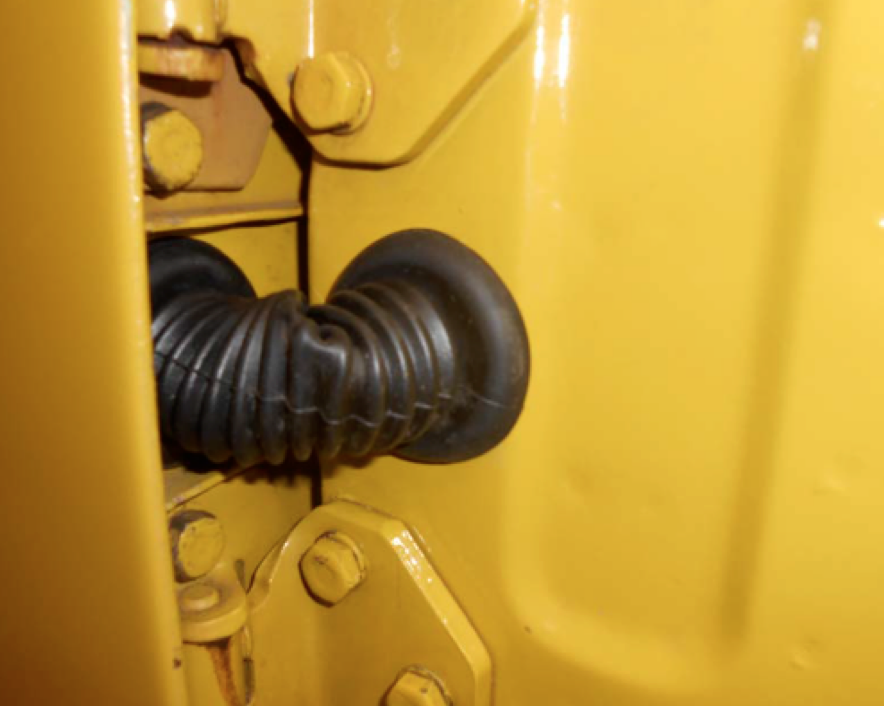
The next thing I had to work out was how to get the wiring from inside the car and into the doors, I checked out how they did it on the Triumph Stag but I wasn’t keen on the way Triumph did it. I went to a local breakers and found a series 1 51 plate Landrover Freelander being dismantled and found that the rubber flexible hoses that they used on these to get the wiring into the doors were what was needed and were the right length .These would need drilling round holes while other cars I looked at would need a square hole and some had a plug and socket arrangement. I marked them up on each door and side wall and then drilled them both out with an inch and quarter hole (32mm) hole saw. Pictures 11,12 and 13.
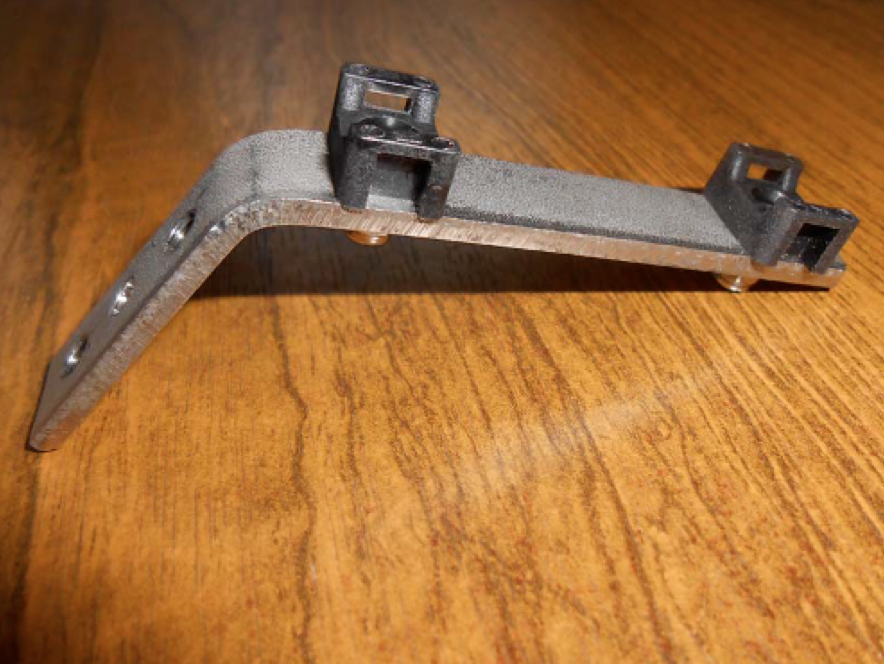
Due to the wiring passing near the door check link straps I made up brackets to fix the wiring onto the brackets to keep the wiring away from the check link straps and make sure that they wouldn’t snag the wiring with the opening and closing of the doors. Picture 14
I then ran in the wiring taking a fused 10 amp supply to a relay which is powered from the ignition side as there are indicator lights built into the switches and if it was a permanent supply it would/could drain the battery over a period of time.
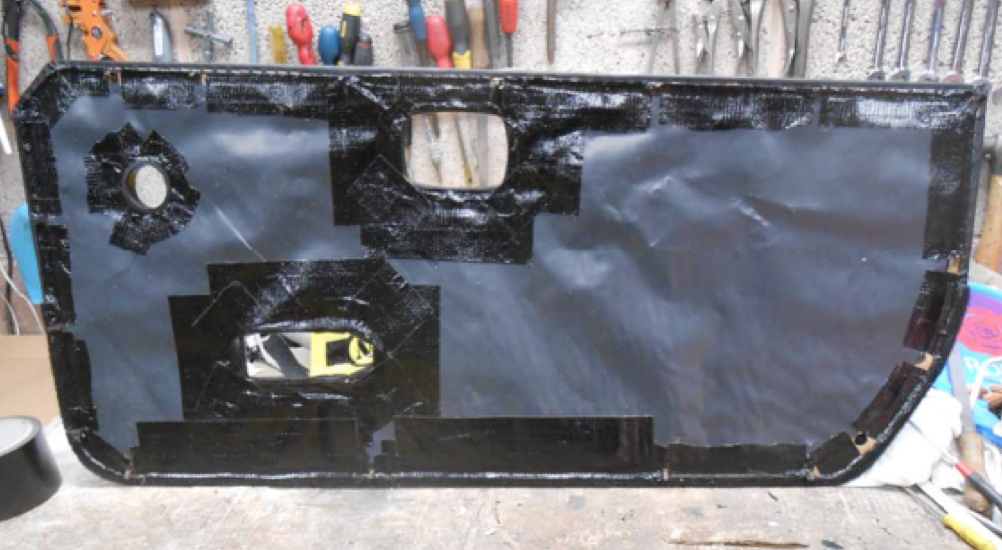
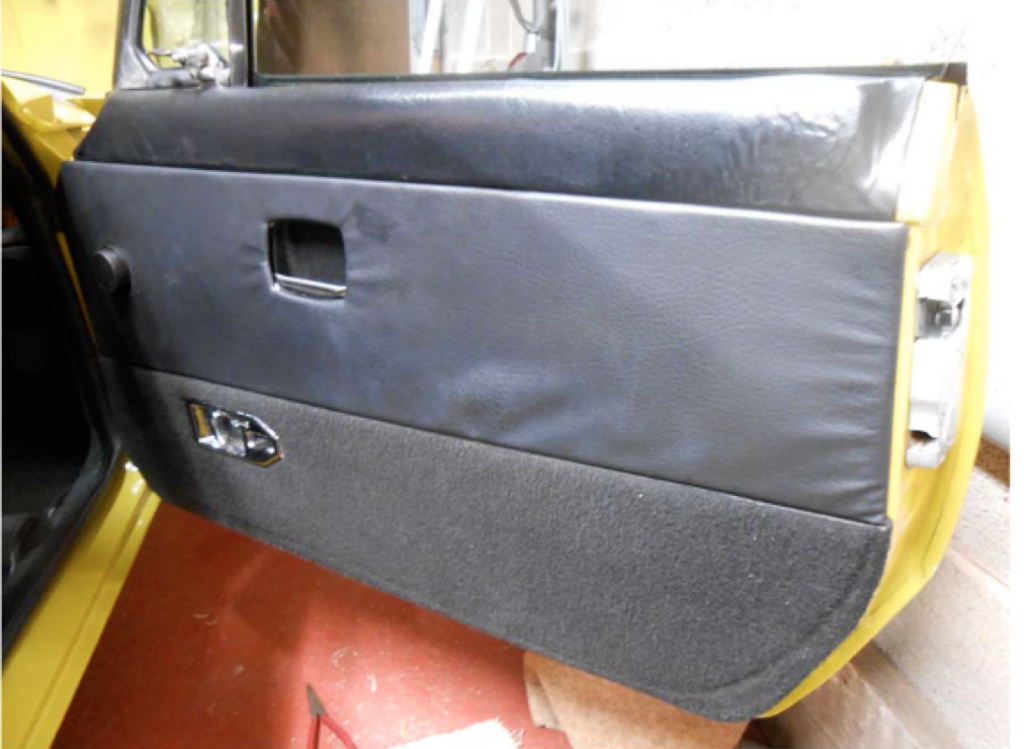
I then had to refit the door cards back on the doors, I loosely fitted the cards and marked the centres of the regulator shafts put some card board inside the door cards so not to damage the vynil while I carefully drilled the hardboard out using a holesaw. While the door cards were off I fitted a plastic membrane to protect them from damp/moisture, Picture 15
I then selected two of the blanks supplied with the kit over where the window winders used to be and refitted the door cards using some new spring clips where needed. The door cards I found flexed enough to cover everything and they still look standard other than the regulator handles are no longer there. Picture 16.
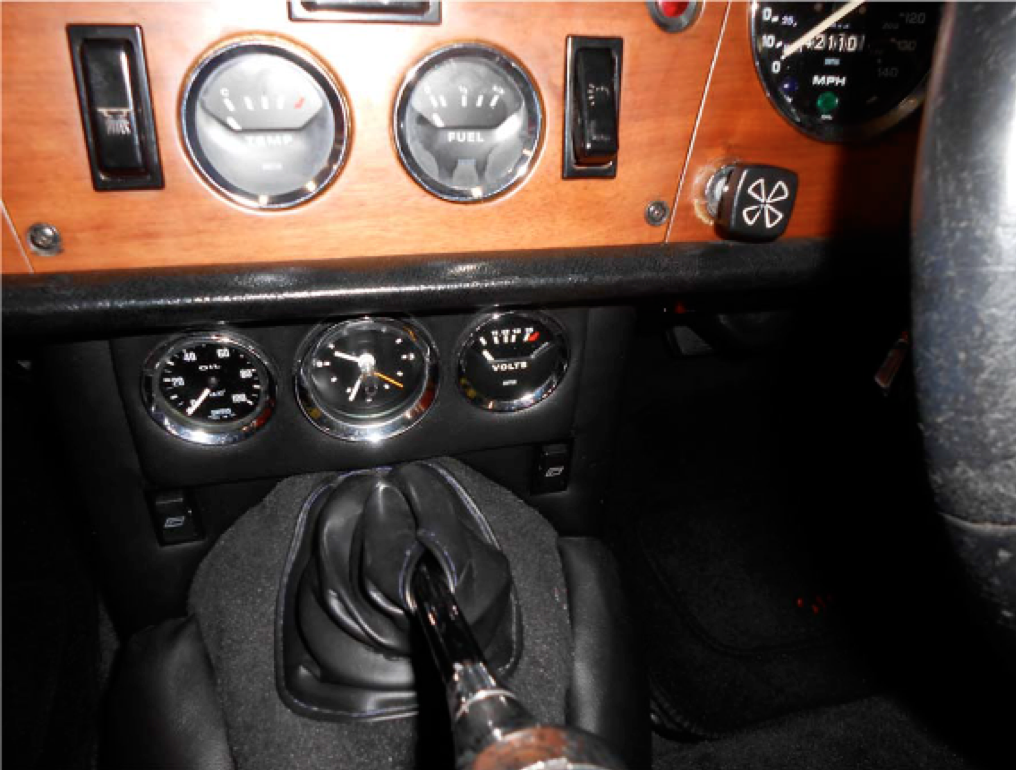
Picture 17 shows the centre consul with the electric window switches fitted in the car.
This job took a few weeks to do, before starting it is important to make sure that the windows operates smoothly with the window winders without tight spots before attempting this, if there are tight spots this needs to be addressed first.
I didn’t want to rush this job and at every point I gave it a lot of thought and consideration taking lots of measuring and checking along the way. I am sure that it could be done quicker but it is a job where you really need to take your time. I am not sure whether it would fit in a Spitfire as the window runners are different to the GT6 and they have full width windows door glass with no quarter glass like a GT6.
On a hot summers day while out in my GT6 with all that heat that comes through into the interior from the engine and gearbox with a flick of a switch I can now open and close both windows with ease while driving along.
Mike.