
GARETH DAVIES TR4A (August 2019)
As mentioned in last months Courier, I had met Gareth Davies at the Malvern Classic Car Show. I had heard a TR4A purring past me through the showground while I was looking at a very nice Spitfire so I tracked its progress and went over to have a look at it when it parked up. The owner Gareth kindly allowed me to have a good look at his car and told me about all the various modifications he had made including the fitting of MX 5 seats for extra comfort which involved in Gareth’s own words “basically remove TR Seats and runners. The only work is buying the fixing plates (2 per seat) which have four holes, each plate, 2 to fix to the Floor and 2 to fix to the Mx5 seat runners.” Gareth very kindly accepted my request for him to send me some words about his beautiful car and true to his word I received the following within the week, thanks Gareth and over to you – Top Man!
TR4A
“Dear Bernie – It was good to meet you at Malvern having seen you in the TSSC magazine over my 15 years of membership of TSSC. I was surprised, yet delighted, that you asked me to pen a few words and pictures about my interest in cars, particularly my TR.
My history with today’s classics goes back to the late 1970’s when I bought a 1.6L Vitesse saloon to keep my Mini company with the intention of turning it into a Spartan and over the next couple of years I used the car to go to work whilst redoing all the mechanicals on the car in preparation. I had just ordered the kit when my “wife to be” decided we needed a deposit on a house – you can guess the rest. Fast forward to my 50th birthday in 2005 when my kids took me to a car show at Malvern after which I went out and bought a TR4A and a Mk2 2.0LVitesse Convertible. The TR was already “restored” but the Vitesse was a restoration job (I did a nut and bolt). I finally got the Vitesse back on the road in 2014 after 8 years of work. As well as the classics I also had a Sabre Royale kit car and an XK8 Convertible which were both fantastic. I reluctantly sold the Vitesse, Jaguar and Sabre. The Vitesse is driving around in Devon and Cornwall and the Sabre went down to Near Venice in Italy while the Jag stayed in the village with a friend.
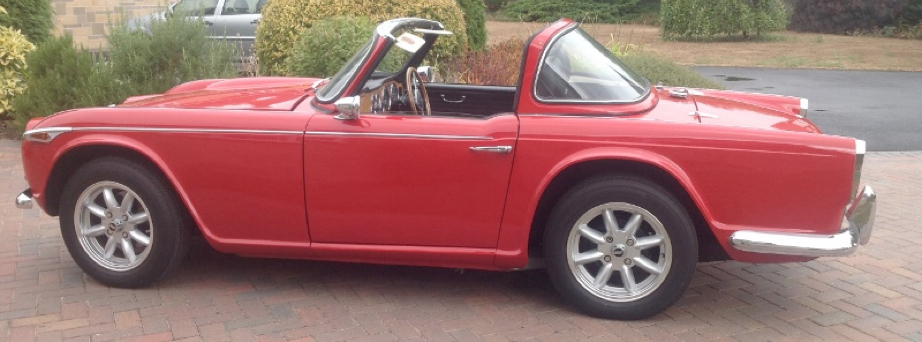
That leaves me with the TR which was restored in the 1990’s and looked good but I quickly discovered it was originally white and had a few mechanical issues. I have never made any major modifications to the car, just what I think are some useful improvements to the car as well fixing some things that were wrong or needed doing so that resulted in a lot of work eventually.
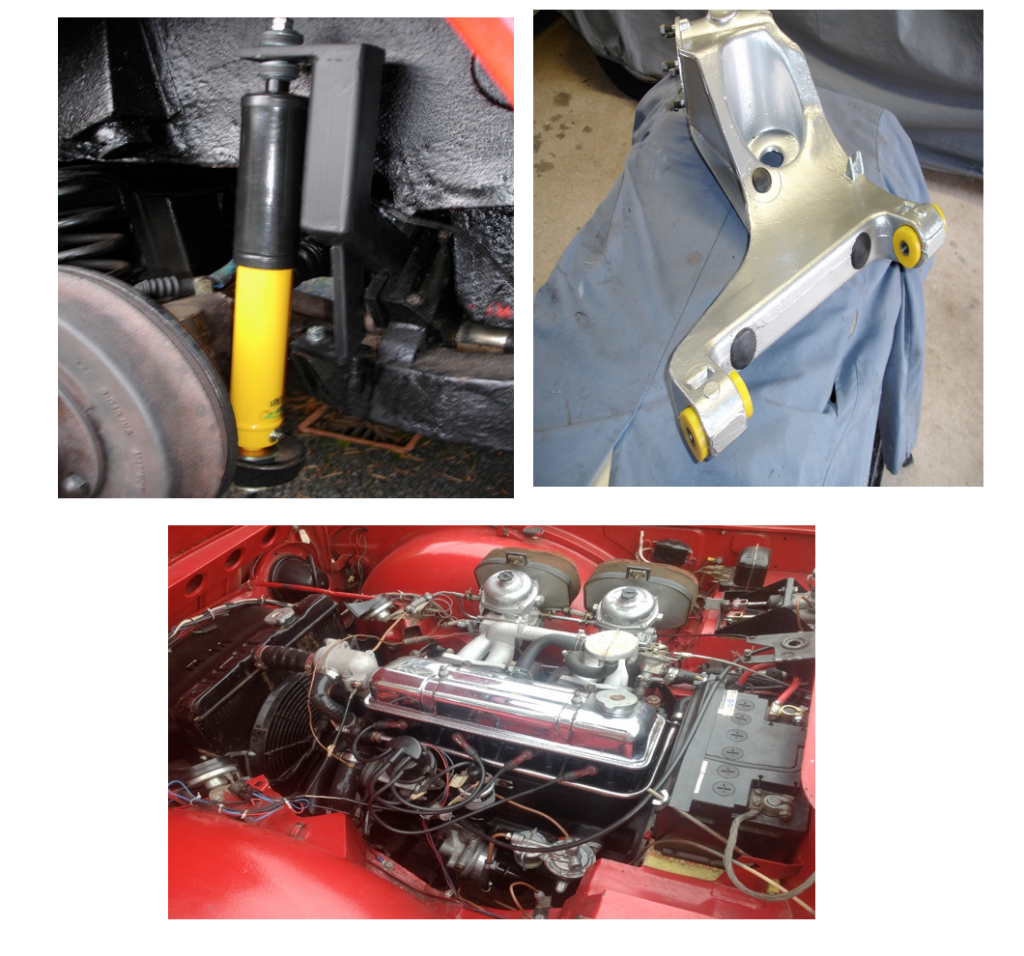
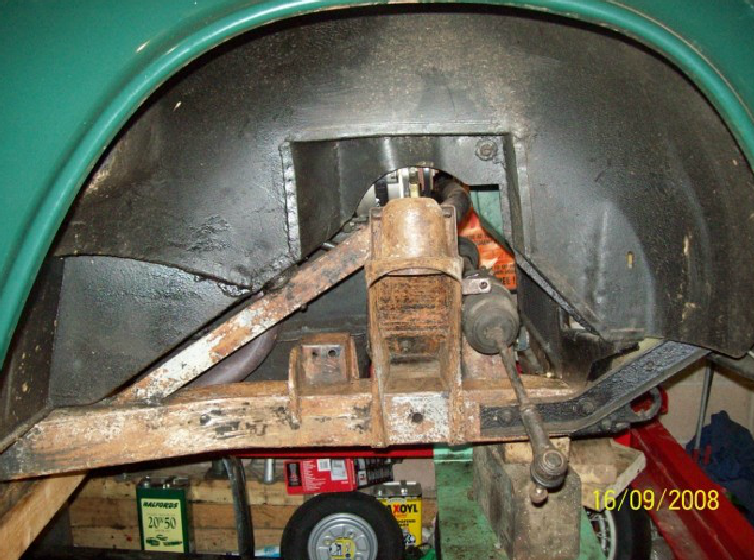
In a nutshell, I re- built the running gear (prop-shaft, differential and drive shafts and suspension including poly bushes, strengthened the chassis at the wishbone mounting points (you can see the extra stiffening gusset in the image, stiffened the suspension (stiffer springs all around), replaced the rear hydraulic suspension arms with adjustable spax shockers (needs purpose built brackets), added a TR6 Roll Bar rather than the TR4 version. I replaced the thin wire wheels with wider Minilite copies and what a difference to the handling all these changes made. Then, there was the engine/gearbox
/overdrive rebuild along with electronic ignition, alternator conversion, Revotec cooling fan to add
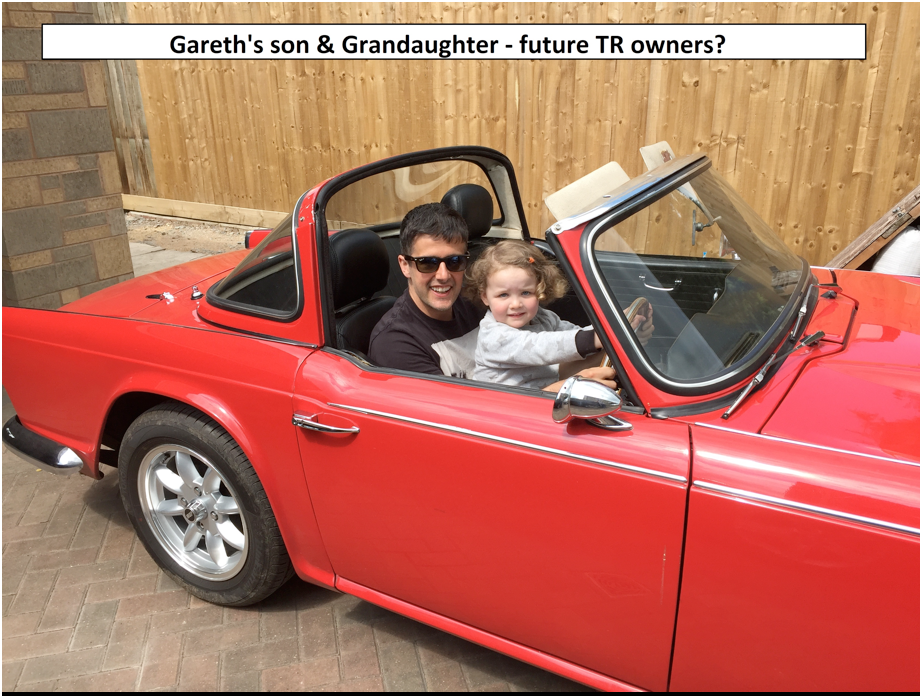
to the driving experience. It really is a pleasure to drive the car today compared to when I first had it. Even my son and granddaughter drive the TR!
Next, I am considering doing something with the interior once I have completed some cosmetic body work as some of the vinyl is splitting and peeling. I have already added leather MX5 Mk1 seats to replace the originals. Although a tight fit, it was a very easy modification once I bought the mounting brackets and it makes a huge improvement to the comfort level. For me they also suit the car and do not look out of place as I am not a purist on originality – just like to drive it and even my wife likes them!

A lot of TR owners have done similar things and more and everything you need is widely available in the supply chain and easy to do by yourself. I am not the best mechanic in the world but would be happy to supply more information to anyone if they need it and I have it
Regards
Gareth
Whether 6 cylinders or 4 a TR is more (more than a Jaguar and Sabre)
by Bernard Littlewood T.S.S.C TR4 reg Secretary
TR4a Front suspension rebuild
by Bernard LittlewoodWhen I first bought my TR4A the negotiated price included an agreement for the previous owner to have the mot’d as the car had been off the road for a few years, so I was very surprised when I picked the car up to find that at speeds of over 40mph I couldn’t so much as steer the car, but point it in the general direction which I wanted to go. I had driven a few TR4A’s when I had been searching for one within my limited price range (for a TR that is) so I knew that my car was at fault and that it wasn’t a general TR4A quirk! The first thing that I checked was the tension of the wheel spokes (TR4A’s had wire wheels fitted as standard) which were fine.
As the tyres were quite old and the car had been sat unused in a garage for a year or two these were the first things to be changed, five new tyres and inner tubes later and the car was, still the same!
I checked the steering column for any play and the bushes seemed fine, but with my son Jack turning the steering wheel with the car firmly on the ground I noticed what I would describe as “ excessive flexing” of the rubber lower steering column joint. Although these joints were available I thought that a more rigid item would give me a better feel through the steering wheel and would also “tighten up” the car’s steering. I did a bit of research and found that a TR6 universal joint type steering column joint would fit and after purchasing one and fitting it I tried out the car. This made a massive difference and I could now steer the car and drive it as a TR should be driven, but as I had made such a big improvement for so little money I decided to continue to try to improve the car’s performance by checking out and reconditioning the front suspension. I also carried out a few more jobs like having the bumpers re chromed while the car was off the road. Although the jobs took a few months I was working at the time and only had an hour or so each evening, also there was no point in rushing the job as I had to wait for the bumpers to come back from the chrome plater’s.
Below is an account in “diary” style to give you an idea of how long the various jobs that made up the rebuild took. I also decided to clean up the brake and clutch master cylinder brackets and the area on the bulkhead where they are situated as there was a lot of damaged paint work from previous fluid leaks or spillage.
14/09/2008
I drove the TR onto my Hamer car lift then jacked the front of the car so that the wheels were off the lift tracks, placed wooden blocks under the chassis and removed the road wheels. I then removed all front O/S suspension components.
4 hours
16/09/2008
The suspension components were cleaned up in parts washer in my then place of employment.
I scraped & wire brushed the front O/S chassis leg and shock absorber/road spring turret back to bare metal and painted them with rust converting paint.
I then cleaned the brake calliper and gave the one side a coat of blue calliper paint.
2 hours
17/09/2008
Today I installed the new wheel bearings in the front O/S hub then painted the front O/S chassis leg & suspension turret with chassis black paint, I then gave the one side of the brake calliper another coat of paint. After that I removed the front & rear bumpers for re chroming.
2 hours
18/09/2008
I wire brushed then painted the bottom front O/S wishbones, mounting brackets, shock absorber bracket and road spring bottom plate then painted all around the front O/S wing to body tub join with black Waxoil.
1 ½ hours
22/09/2008
The bottom front O/S wishbones, mounting brackets, shock absorber bracket & road spring bottom plate were given another coat of paint. I then painted the other side of the brake calliper then painted Waxoil on inside of front O/S wing and body tub.
Next I removed the front O/S track rod end and gaiter.
1 ½ hours
23/09/2008
Today I fitted new bushes to the bottom front O/S wishbones, cleaned and greased the two sets of shims then installed the new “standard TR4A” front O/S road spring complete with bottom bracket and lower wishbones.
I then greased the O/S steering rack arm and fitted a new gaiter.
2 ½ hours
24/09/2008
The brake and clutch pedal assembly along with the clutch and brake master cylinders and brackets were removed.
I then gave the top O/S wishbones, master cylinder bracket, clutch & brake pedals, disc brake dust cover, wheel hub and vertical link a coat of paint.
1 ¼ hours
25/09/2008
The top O/S wishbones, master cylinder bracket, clutch & brake pedals, disc brake dust cover, wheel hub and vertical link were given another coat of paint. I then installed the lower wishbone nylon bushes.
1 ¼ hours
26/09/2008
The next to be assembled were the top wishbones (with new poly bushes) & vertical link. I then placed a jack under the bottom wishbones and removed the road spring compressor.
I then installed the new shock absorber (after first having to drill out the bottom eye to 7/16 from 3/8 !).
1 ½ hours
03/10/2008
To the front O/S suspension I fitted a new track rod end, tightened all suspension nuts and installed new split pins, I then installed the brake disc brake back plate.
1 hour
04/10/2008
I removed the pistons from the O/S brake calliper, although they are in good condition I will fit new ones. I found that the wrong type of dust seal had been supplied with the seal kit that I bought. I will have to buy new kits as the old ones were damaged while disassembling.
1 hour
05/10/2008
Today I removed the N/S brake calliper, removed the pistons and sprayed it with degreaser. I then removed the front N/S hub and disc brake.
I then undid the N/S shock absorber top nuts and the four nuts that hold the bottom brackets onto the lower wishbone. The brackets were rusted solid onto the wishbone so I sprayed them with Plus Gas. I then sprayed Plus Gas on all N/S suspension bolts & nuts.
1 hour
10/10/2008
I removed the front N/S shock absorber, top and bottom wishbones, road spring, vertical link and track rod end.
1.25 hours
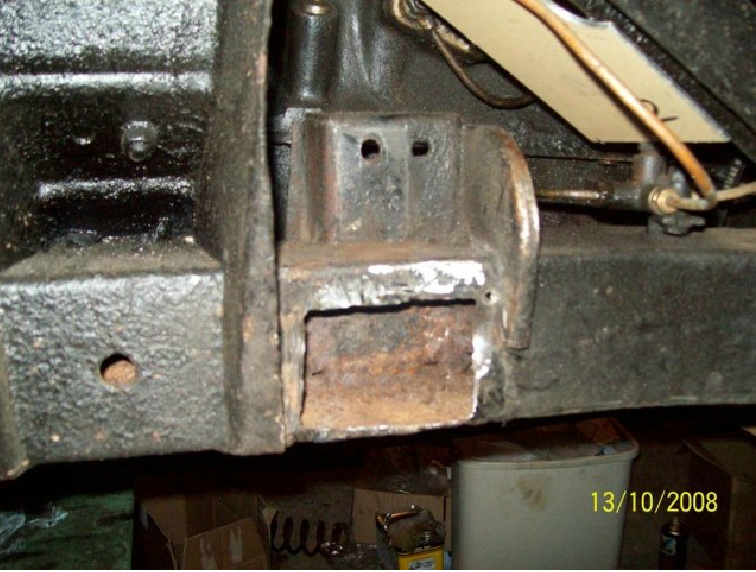
13/10/2008
I drilled and chiselled out a patch that was on the front N/S chassis near the lower rear wishbone mount (vertically) and found a lot of dry corrosion from the original chassis inside the chassis leg. I removed the corrosion using a telescopic magnet. I then dressed the edges of the hole and made a template of the shape. There is also a hole in through the back plane of the chassis which I will fill with weld. I won’t paint the patch with weld through primer as I will ensure that the entire inner chassis leg gets an extremely generous coating of wax oil.
1 ¾ hours
14/10/2008
I welded in a patch flush to the N/S front chassis. I also welded a patch on the inner vertical face butting against the lower wishbone mount.
1 ½ hours
15/10/2008
I ground down the welds and applied more welds to strengthen the repair. I then found that there was a hole (caused by corrosion) on the top of the chassis leg to the left of the lower wishbone mount so I made a patch and welded over the hole and to the wishbone mount ( after spraying on weld through primer ). As I found so much corrosion I will now make a larger strengthening patch to cover the original repair on the front vertical chassis leg, just for peace of mind. I then sprayed the repair with weld through primer ready for when I weld on the over patch.
1 ½ hours
16/10/2008
I made a strengthening patch in work, sprayed it with weld through primer and seam welded it in position. I then sprayed the area with stone guard, then started scrapping the old paint & under seal from the rest of the chassis leg and suspension turret.
1 ½ hours
17/10/2008
Today I cleaned inside the front N/S wing and then painted it with black Waxoil. I then painted the front N/S chassis leg and suspension turret with rust killing black paint.
Next I injected the two front chassis legs and suspension turrets with Waxoil.
2 ¼ hours
18/10/2008
Today I painted all the front N/S suspension components including the brake calliper.
1 ¼ hours
19/10/2008
I removed the front N/S steering rack gaiter then gave all the suspension components another coat of paint.
1 ½ hours
20/10/2008
I installed the new “standard TR4A” front N/S road spring and bottom wishbone using new poly bushes.
1 ½ hours
21/10/2008
The front N/S top wishbone with new poly bushes was installed today, I then filled the lower trunnion with oil and installed vertical link.
1 ¾ hours
22/10/2008
When checking that the brackets for the front N/S lower wishbones were pulled tight against their mountings I found that the rear one had a slight gap near the bottom. It is likely that the bracket is holding off because of the weld on the plate that I had put on the chassis had butted against the mounting.
1 hour
22/10/2008
I removed the front N/S wishbone assembly and relieved the bracket that was holding off I then replaced the wishbone and reconnected the vertical link. After this I fitted a new steering rack gaiter to the N/S.
I then removed the front O/S shock absorber, lower wishbones, wheel hub and vertical link and pressed poly bushes into the lower wishbones (I had used the nylon type previously by mistake !) and re assembled the lower wishbones, shock absorber & vertical link.
3 ¾ hours
23/10/2008
It was now time to replace the front O/S wheel hub complete with the new wheel bearings and D washer. I then fitted the front N/S shock absorber and while doing so I noticed that there was a gap between the bottom eye and the mounting brackets so I removed the assembly and placed washers between the eye and the mounts then re assembled it all. I checked the O/S and found that there was a gap the one side, so I removed the assembly, placed a washer in the one side then re assembled it all.
1 ¼ hours
07/11/2008
Installed new piston, seals and dustcovers in the font O/S brake calliper and installed it complete with the brake pads. I then removed the old steel brake pipe that connected the front O/S flexi pipe to the four way junction on the front N/S chassis leg, made a new one from copper pipe and installed it.
I then installed the front N/S wheel hub complete with new wheel bearings and cleaned any excess grease from the front O/S & N/S suspension.
3.5 hours
08/11/2008
I touched up any scratches that I could see on the front suspension components then masked up the area around the front bulkhead which had previously been painted with a rust treatment and gave it two coats of primer. I then removed the front N/S bumper bracket and the two rear O/S brackets to be shot blasted and repainted
1 hour
09/11/2008
Today the front bulkhead area where master cylinders locate were given two coats of paint.
½ hour
10/11/2008
I installed one piston in the front N/S brake calliper then gave the bulkhead area another coat of paint. I then assembled the clutch & brake pedal assembly using a new shaft and bushes.
1 ¾ hour
11/11/2008
I replaced the front N/S & rear O/S bumper irons and removed the front O/S and rear N/S ones for de rusting and painting. I then installed the second piston in the N/S brake calliper with new seals and dust cover then installed the calliper.
1 ½ hours
12/11/2008
I made and fitted a copper brake pipe to connect the front N/S calliper to the flexi pipe, cleaned the underneath (drivers footwell ) of the bulkhead where the brake & clutch master cylinders locate and painted it with anti corrosion/rust killer paint.
13/11/2008
Installed the clutch & brake pedal assembly complete with master cylinder bracket, clutch master cylinder and new brake master cylinder. I removed the old brake line that linked the master cylinder to four way junction on the front N/S chassis leg and made a new one out of copper pipe and installed it.
2 ¼ hours
14/11/2008
I bled the brake system and will check to see if it is OK in a few days time. I then removed the steering column, stripped it down, replaced the bushes (even though they felt fine, they fell apart on removal ), re assembled and re installed it.
4 hours
15/11/2008
I gave the front O/S & rear N/S bumper irons a coat of black enamel paint. Checked the underneath of the car and touched up any scrapes with Waxoil based under seal. I then measured the bottom of the outer steering column so that I can have a custom made collar manufactured, as the original one is missing (if there ever was one ).
½ hour
21/11/2008
Today I installed the collar that I had made on the outer steering column then tightened all clamps.
I then fitted the front O/S & rear N/S bumper irons. Next to be fitted was the front splined wheel hubs and road wheels. I then lowered the car back onto its wheels, the front end was looking a bit too high for my liking, but in the very unlikely event that the suspension may “settle” I left it as it was.
1 ½ hours
12/12/2008
The bumpers finally came back from platers so I painted the inner surfaces of the two bumpers & front over riders with black enamel paint.
¾ hour
18/12/2008
Before I could fit the bumpers I found that I had to open up most of the bolt holes as they had “closed up” with layers of chrome plate.
¼ hour
20/12/2008
I fitted the front bumper, over riders and badge bar then loosely bolted the rear bumper and over riders in place.
½ hour
22/12/2008
Today I completed the fitting of the rear bumper and then fitted the front number plate. I tried to start the car, but found that I had to work out where the electronic ignition feed had been before I had disconnected it. I also found that I had not refitted the alternator plug. When I had sorted this out the car started.
2¼ hour

23/12/2008
I took the car for a drive through about 7 miles of lanes to see if the front suspension settled to a lower level. It didn’t, I will use the car as it is for this year, then look at finding lower front springs or putting the old ones back in.
The front suspension never did settle to an acceptable height so after a few weeks of driving the car, I removed the new “standard TR4A front springs” and replaced them with the original re painted ones. The car now looks “right” and now actually handles and steers as a well set up TR4A should.
Keep your liners wet!
Bern